Before we examine how to play guitar scales, we need to first look at how to read guitar scale diagrams.
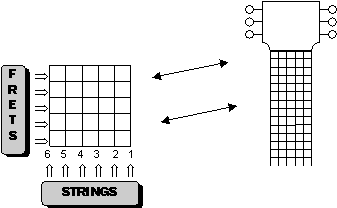
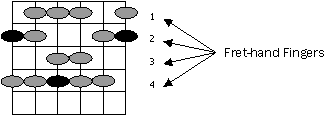
The following fretboard diagrams represent isolated sections on the neck of the guitar. The vertical lines represent the strings, while the horizontal lines represent the frets. The strings are numbered from the thinnest (1), to the thickest (6).
To save space, only the applicable portion of the neck will be shown for each scale. So, instead of showing all of the frets on the guitar, we will just show a representation of the portion of the neck we need.
Numbers found on the left side of the grid indicate specific frets. If there are no numbers beside a grid, assume that it represents the first five frets.
Fret-Hand Positioning
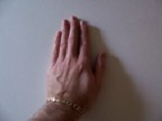
All fingerings for guitar scales and melodies using the Berklee system are based on the principle of one finger per fret. This means that if you position your first finger on the fifth fret, the following will happen: your first finger will play all notes found on the fifth fret, your second finger will handle the sixth fret; your third finger will play notes on the seventh fret and your fourth finger will play notes on the eighth fret. Of course these fingering principles don’t always apply to chords, but they do for scales and melodies.
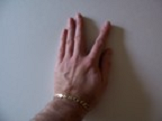
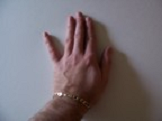
In some situations you will find it necessary to have one finger play the notes on two frets. Instead of shifting your whole hand up or down one fret, it is most practical to leave your hand in one position and have one finger cover the notes on two frets. The finger that will do the stretching will either be your first finger or your fourth finger. Occasionally you will encounter circumstances that will require a double stretch with your first and fourth fingers.
No stretches
First finger stretch
Fourth finger stretch
Double stretch, first and fourth fingers
As you can see in the above fingering for the major scale, each finger is assigned a specific fret and would play any note on that fret.
The black notes represent the root notes in the scale. The root note is the note that tells you the letter-name of the scale. The grey notes are the other scale tones. Other books and publications may use different symbols to indicate the location of the root notes in scales.
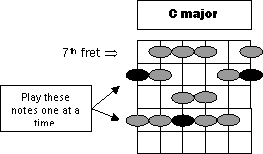
Scales are usually practiced from the lowest-pitched-note to the highest. If the above scale form is positioned so that the first finger is on the 7th fret, you would have a C major scale. Here is how you would play the C major scale.
Well, there you go. You now know the basics of reading guitar scale diagrams. The best way to practice guitar scales at first is to play them ascending and descending—this will allow you to become familiar with the fingering and sound of the scale.





Pingback: Guitar Lesson: A Fun Alternate Picking Song to Work on This Labour Day Weekend | Guitar Accelerator Blog: Play Guitar - Electric and Acoustic Guitar Lessons
Pingback: Lead Guitar Technique: How to Break Free from Pentatonic Scales to Create Your Own Cool Guitar Solos Part 2 | Guitar Accelerator Blog: Play Guitar - Electric and Acoustic Guitar Lessons