
Introduction
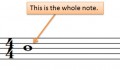
In our previous tutorial, we looked at how whole note, half note and quarter note rests are notated. Just in case you missed it, here is the link: Playing Rhythm Guitar: Basics Part 5 – Understanding Rests
Now it’s time to apply your new knowledge to chord progressions. We are also going to cover how to mute strings so you get a nice clean sound.
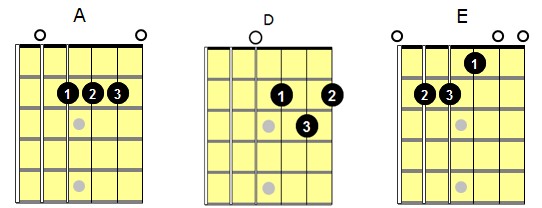
For this example, we are going to use A, D and E major chords.
Muting
When you strum guitar chords, you will often need to mute strings. This is a very important guitar technique to master. Fortunately, it’s quite easy to learn.

When you learn how to mute, your sound will dramatically improve.
Muting allows you to punctuate chords.
Muting adds clarity to your sound.
There are two aspects to muting:
- The fret-hand.
- The pick-hand.
Sometimes you will need to use both; other times you will only need one.
Fret-Hand Muting
To mute with your fret-hand, simply release pressure off of the strings.
Keep your fret-hand fingers on the notes of the chord, and release pressure off of the strings so the notes don’t sound anymore.
By doing this you will stop all of the fretted notes from sounding.
Pick-Hand Muting
If there is one or more open strings in the chord, you will need to use your pick-hand to mute them.
All you do is apply a little bit of pressure on the open strings using the underside of your pick-hand. Your goal is to stop the open strings from ringing.
Now let’s take a look a some examples…
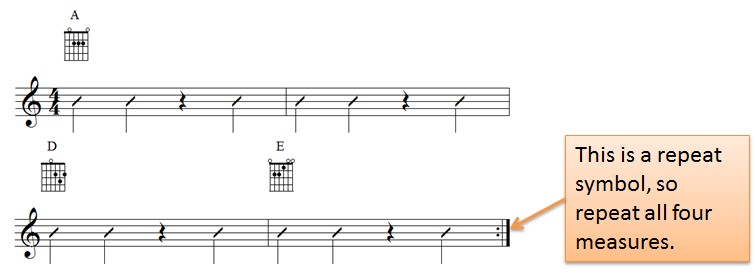
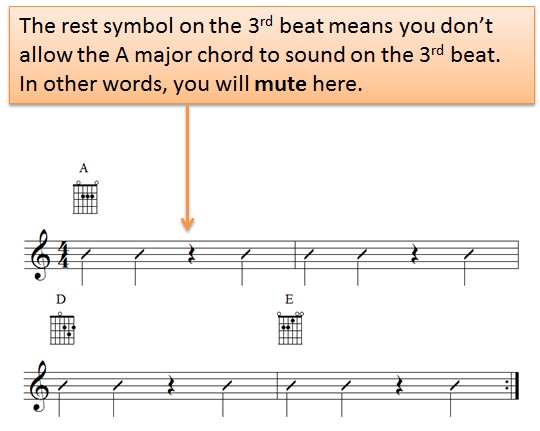
The rest symbol on the 3rd beat means you don’t allow the A major chord to sound on the 3rd beat. In other words, you will mute here.
Keep your fingers positioned on the appropriate frets and strings and release pressure so that there is no sound on the 3rd beat. Also use the side of your pick-hand to mute the open strings. On the 4th beat, play the A major chord again.
Now let’s look at a second example…

So there you go, you’ve now got the basics of how whole note, half note and quarter note rests are notated what to do when you see them.
Create your own examples are practice them with different chords.
Recommended Resource
 Are you ready to get your hands on a proven, fast and easy way to learn the basics of music theory for guitar? The Absolute Essentials of Music Theory for Guitar lays out what you need to know about music theory crystal-clear.
Mastering the basics of guitar theory will open up a whole new world to you. You will learn guitar faster and hear big improvements in your guitar playing.
Get started now and take the mystery out of music theory so you can learn guitar faster…
Related Posts
 Playing Rhythm Guitar: Basics Part 1
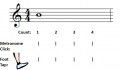 Playing Rhythm Guitar: Basics Part 2 - Using a Metronome to Improve Your Sense of Rhythm
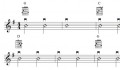 Playing Rhythm Guitar: Basics Part 3 - Basic Strumming Patterns
 Playing Rhythm Guitar: Basics Part 4 - Understanding Quarter Notes
 Playing Rhythm Guitar: Basics Part 7 - Understanding Eighth Notes
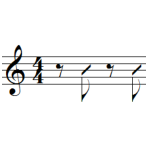 Playing Rhythm Guitar: Basics Part 10 - Understanding Eighth Note Rests
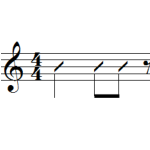 Playing Rhythm Guitar: Basics Part 11 - Counting Rhythms Revisited or a Simple Trick to More Accurate Time Keeping
 What’s the Best Way to Count Sixteenth Notes? A Rhythm Guitar Tutorial
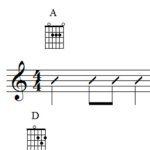 Playing Rhythm Guitar: Basics Part 9 - Strumming Eighth Note Chord Progressions
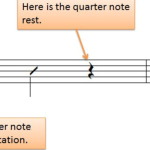 Playing Rhythm Guitar: Basics Part 5 - Understanding Rests
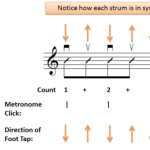 Playing Rhythm Guitar: Basics Part 8 - How to Strum Eighth Notes on Guitar