Having Trouble Playing Guitar Barre Chords?
Barre chords are incredibly versatile and practical guitar chords. In fact, every guitar player should know how to play at least the most common barre chords.
The trouble is that depending on your skill on the guitar, barre chords can sometimes be tricky to play.
The good news is with the right approach, you can master even the most challenging of these chords.
In this tutorial, we will look at an easy starter barre chord and you’ll learn some tips that will make barre chords much easier to play.
What is a Barre Chord?
A barre chord, or bar chord, is simply a chord that requires you to use a single finger to play the notes on two or more adjacent strings.
So as you can probably guess, the greater the number of strings that need to be barred, the more challenging the barre chord will usually be.
With this in mind, it should make lots of sense that we should start with chords that only require you to barre across two strings. This will allow you to get a feel for barre chords.
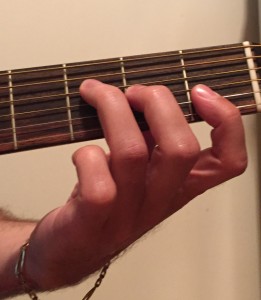
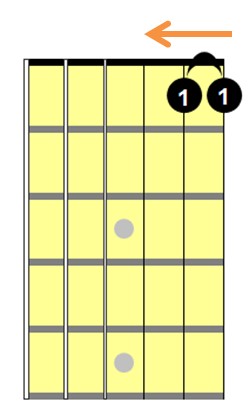
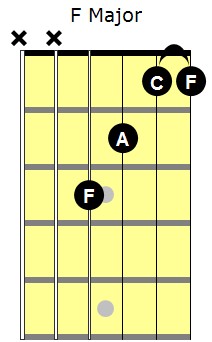
In the F major barre chord shown below, you place your first finger flat across the first and second strings. Both of these notes are played on the first fret.
Your second finger plays the note on the third string second fret.
And your third finger plays the note found on the fourth string, third fret.
Troubleshooting
If find that you are not able to produce clear notes in the chord, start with just your first finger. Place your first finger flat across the first and second strings on the first fret.
 Experiment with How Much Pressure You Use
Experiment with how much pressure you are using. You might find that you need to push quite hard on the strings to get the notes nice and clear.
But what you will probably find is that a little reposition of the first finger may be all you need to get the notes to sound nice and clear.
Reposition
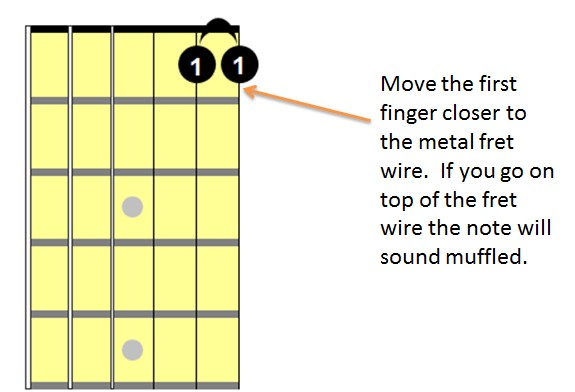
If you are not getting clear sounding notes, start by moving your first finger as close as you can to the fret wire. Don’t actually make contact with the metal fret wire or you will get a muffled sound. The closer you get to the fret wire, the easier it is produce a clean note—less physical effort is required.
 Up Shift
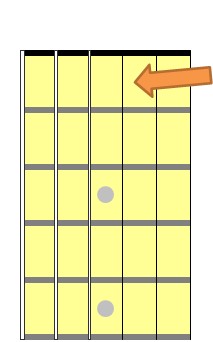
If you are still not getting clear notes, try shifting your first finger further across so that it is closer to the third string.
Down Shift
You can also try the opposite and move your first finger down lower so it isn’t making as much contact with the second string.
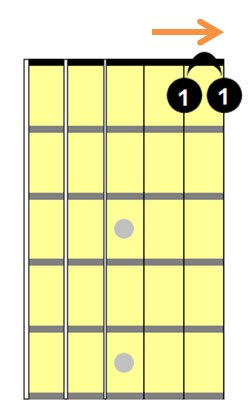 Angle Shift
And finally, you may find that you get nice clear notes if you slightly angle your first finger.
With these simple adjustments, you should find that you can now accurately barre across the first and second strings.
Add the Remaining Notes
So next you should add the remaining two notes needed for the chord.
Add the notes one at a time making sure as you add the notes, each note still sounds clear. If you add one of the remaining notes and you can’t produce a good clear chord, you need to experiment with the placement of fingers.
Playing Barre Chords ≠ Brute Force
Playing barre chords is not about applying brute force to strings and neck—although at first it may seem like that is the case. Muscular effort is required to fret the notes, but for many guitar players it’s more about the subtle nuances of fret-hand fingering. A slight shift of a finger up or down, or a slight change in the angle of the finger is usually all that’s required to get a troubled barre chord to sound great. Also, as you get better calluses on your fingers, you will find chords easier to play.
Do Try This at Home
It’s important that you practice this barre chord fingering up and down the fretboard. As you move further up the neck of the guitar, the frets get closer. This can make some chords easier to play because there is less stretching involved.
It can also become more difficult the further you move up the fretboard because as the space between the frets decreases, it also means there is less space to squeeze your fingerings in.
So practice playing this chord on each fret from one to twelve. Remember that there are no open strings in this chord voicing.
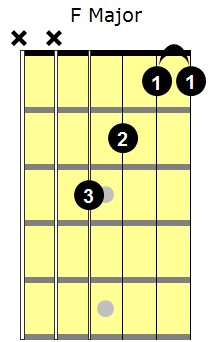 The notes found on the fourth and first strings are the root notes of the chord. The root note is the letter-name of the chord.
What this means is you can move this chord up and down the fretboard and it will always be a major chord. The root note tells you the letter-name of the major chord.
So when this chord is played on the first fret it is an F major chord.
If you play this chord on the fifth fret, it will be an A major chord. It is called A major because the root notes are on A’s.
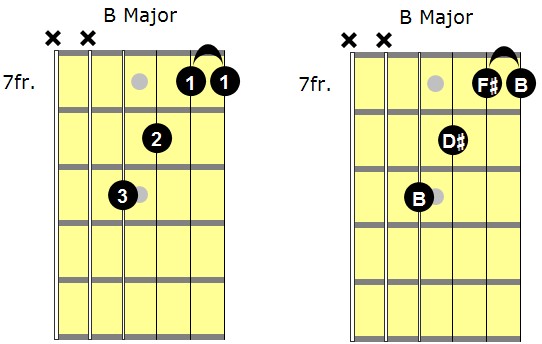
If you move this up to the seventh fret it would be a B major chord because the root notes are on B’s.
So there you go, you’ve now got the basics of barring across two strings. In part 2 of this tutorial series, we will look at barring across three strings.
Recommended Resource
 For a quick and easy way to learn and master the barre chords every guitar player should know, check out Guitar Essentials: Chord Master Expanded Edition.


